
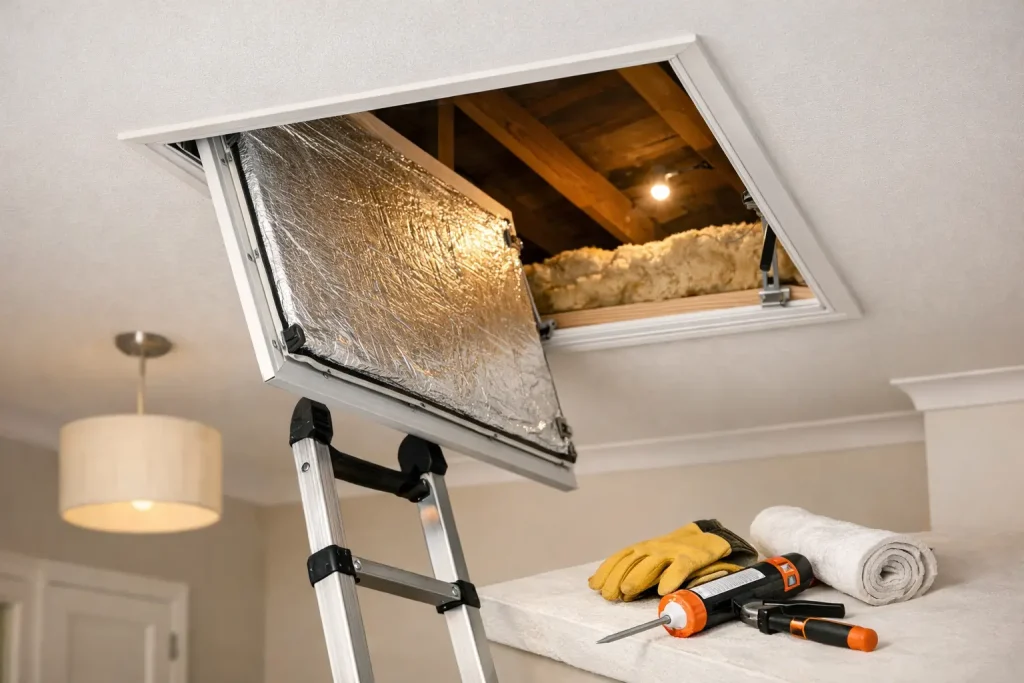
A loft hatch is easy to overlook until it becomes awkward to use, lets in a cold draught or no longer closes properly. If you are considering how to replace loft hatch access in your home, it is worth treating it as more than a simple ceiling panel. The right hatch can make loft storage safer, improve access and help keep valuable heat where it belongs.
For many homes around Milton Keynes and the surrounding area, an older hatch is often too small, poorly insulated or fitted without an effective seal. Replacing it properly is an opportunity to create a safer, more practical entrance to the loft while supporting the performance of your insulation.
Start by identifying what needs to change
Not every loft hatch needs the same solution. A timber drop-down panel that has warped may only need replacing with a better-fitting insulated hatch. In other homes, the opening itself is too small for safe access or for bringing storage items into the loft. A hatch that sits directly above a stairwell also needs particularly careful planning, as access must be secure and comfortable to use.
Look for obvious signs that the current hatch is no longer doing its job. These include visible gaps around the edge, staining from condensation, a loose or damaged frame, difficulty lifting the panel, or a noticeable cold spot beneath the opening. If the hatch has no insulation above it, it can become one of the weaker points in an otherwise well-insulated ceiling.
It also helps to think about how you use the loft. Occasional access for a boiler or electrical equipment calls for a different setup from a loft used for organised household storage. If access is regular, a hatch, ladder and boarding system should work together rather than being chosen separately.
Choose the right replacement loft hatch
The main decision is usually between a hinged hatch and a removable panel. Hinged hatches are often easier and safer to operate because they remain attached to the frame. They can be fitted to open downwards or upwards, depending on the available loft space and the type of ladder being used.
A removable panel can suit a small, infrequently used opening, but it needs somewhere safe to be placed while you climb through. It is rarely the best choice where access is regular, where the panel is heavy, or where there is limited room on the landing below.
Size matters just as much. Enlarging a hatch can make a real difference when carrying boxes, suitcases or seasonal items, and it gives better clearance for a loft ladder. However, ceiling joists, wiring, pipes and the direction of the existing structure all need checking before an opening is altered. This is not a case of simply cutting a larger hole in the ceiling. The new frame must be properly supported and finished so the ceiling remains neat and secure.
A good replacement hatch should include an insulated lid and a draught seal. These details are easily missed, yet they make a meaningful difference to comfort and heat loss. The hatch should sit flush, close firmly and avoid compressing the surrounding insulation.
Insulation and airtightness are not optional extras
Heat rises, and a poorly sealed loft hatch gives it a direct route into the roof space. Even if the loft floor has modern insulation, an uninsulated hatch can leave the room below feeling colder and may contribute to condensation around the opening.
The aim is to match the hatch’s thermal performance as closely as practical to the surrounding ceiling. This generally means a suitably insulated lid, a continuous seal around the frame and a careful finish at the ceiling line. A hatch should be easy to open, but it should not rattle, bow or leave visible gaps when closed.
This is particularly relevant if you are improving insulation at the same time. In newer properties, insulation depth is often substantial, so the hatch arrangement and any boarding need to preserve that depth rather than squash it down. Raised boarding systems using NHBC approved loft legs can help protect insulation performance in qualifying new homes while creating useful storage space above it.
What the installation process should involve
A professional loft hatch replacement begins with an assessment of the existing opening, ceiling construction and access below. Measurements are taken not only for the hatch but also for headroom in the loft, the landing layout and the safe position of any ladder.
Once the appropriate size and style have been agreed, the old hatch and frame are removed carefully. If the opening is being enlarged or reshaped, the surrounding structure is checked and reinforced where necessary. The new frame is then fitted level and square, which is essential for a hatch that closes correctly and maintains a reliable seal.
The hatch itself is installed, insulated and adjusted so it opens smoothly. If a loft ladder is included, it should be fitted to the correct load rating and positioned for stable use. Finally, the ceiling edge is neatly finished and the area is left clean and tidy.
The detail is what separates a long-lasting installation from a hatch that soon sticks or leaks air. A rushed fit can leave cracked plasterboard, uneven gaps and an awkward panel that homeowners are reluctant to use. A properly installed hatch should feel like a natural part of the home, not an afterthought.
When it makes sense to enlarge the opening
A larger loft hatch is often worthwhile when the existing opening is restrictive, especially for family homes short on storage. Standard small openings can make it difficult to move even ordinary storage boxes through the ceiling safely. They can also make ladder access less comfortable, increasing the temptation to overreach or use unsuitable equipment.
That said, bigger is not always better. The ideal size depends on the structure above the ceiling and the room layout below. In a narrow hallway, for example, a very large downward-opening hatch may obstruct doors or circulation space. A specialist survey can identify a practical size that improves access without creating a new inconvenience.
If you are adding loft boarding, planning the hatch size early is sensible. There is little value in creating a generous storage area if the entrance only allows small items through. Considering the full route from the room below to the boarded area leads to a far more useful result.
Safety points that should not be overlooked
Loft access involves working at height, moving items through an opening and stepping onto a floor that may not be designed for storage. The hatch is only one part of a safe setup. A secure ladder, adequate lighting and a clearly boarded route are equally important where the loft is used regularly.
Avoid storing items directly on insulation or relying on ceiling joists as a general storage platform. Insulation can be damaged or compressed, while unsupported plasterboard ceilings are not designed to carry stored belongings. If there is any uncertainty about the condition of the loft structure, an experienced installer can explain what is suitable before work begins.
It is also worth checking for cables, pipes and ventilation around the hatch area. These services should never be trapped, strained or covered in a way that prevents safe access for future maintenance.
A replacement hatch can improve the whole loft
Replacing a loft hatch is often the first practical step towards a loft that is easier to use and less wasteful of heat. It can solve a frustrating everyday problem, but it also creates the right foundation for safer access, raised boarding and effective insulation.
Loft Accessories can assess the existing hatch as part of a free home survey, explain the options in plain terms and provide a detailed written quote before any work is arranged. The best choice is the one that fits your home, protects its thermal performance and makes reaching your stored belongings feel straightforward rather than risky.
A well-fitted loft hatch should close quietly, keep draughts at bay and give you confidence each time you need the space above your ceiling.